Welcome to Week 5 of the New Hexagon Scrappy Quilt Along featuring the English Paper Piecing Templates by Cabin in the Woods Quilters and fabrics by ADORNit. We are excited to see that some of you are trying the templates out at home and giving great feedback on the Etsy shop. I would love to get more comments here on the blog and the website.
Monthly Subscription Box
It was suggested that we might put together a Monthly Subscription Box with templates and patterns that you could choose to purchase each month to help build up your template stash. I love that idea and wonder what all of you think. This would not be a “blind” subscription box. You would get to see the template set and decide if you would like it. The projects and goodies included would be a surprise. Please let us know what you think in the comments.
Most Versatile Templates
After several Guild visits since the release of the templates, the same questions keep cropping up. Mostly questions about what sets we find most versatile and what other supplies are necessary when working with English Paper Piecing / Hand Stitching designs. So this week I thought I would answer that question above and show you some of my favorite tools that I use every day when working with my templates.
The most versatile sets question is the hardest one to answer and depends on what you are making. If you are working with the New Hexagon Book or Calendar you will use mostly templates related to 60˚ angles. (Those templates include Hexagon, Half Hexagon, Jewel, Kite, Hex Peaks, 60˚ triangle, 120˚ Isosceles Triangles, and 6 Pointed stars. The most used will be 60˚ Triangle templates large and small and 6 Pointed Star templates Large and Small. I have created a list at the bottom of the blog posts with the sets we have used so far in this Quilt Along and these two are definitely used over and over along with the Hexagon Small and Large Sets. These sets will also be used for the setting.
Keep in mind the reason we created the sets is so they would be more versatile for you to use vs. buying a specific template set for a specific quilt that you may only use once (for example, our Millefiori sets which are measured in cm and are quilt specific). CWQ template sets come in multiple sizes to match many common patterns and we also make all templates based on mathematical angles so that they all work and fit together no matter what you are making.
My Favorite English Paper Piecing Supplies
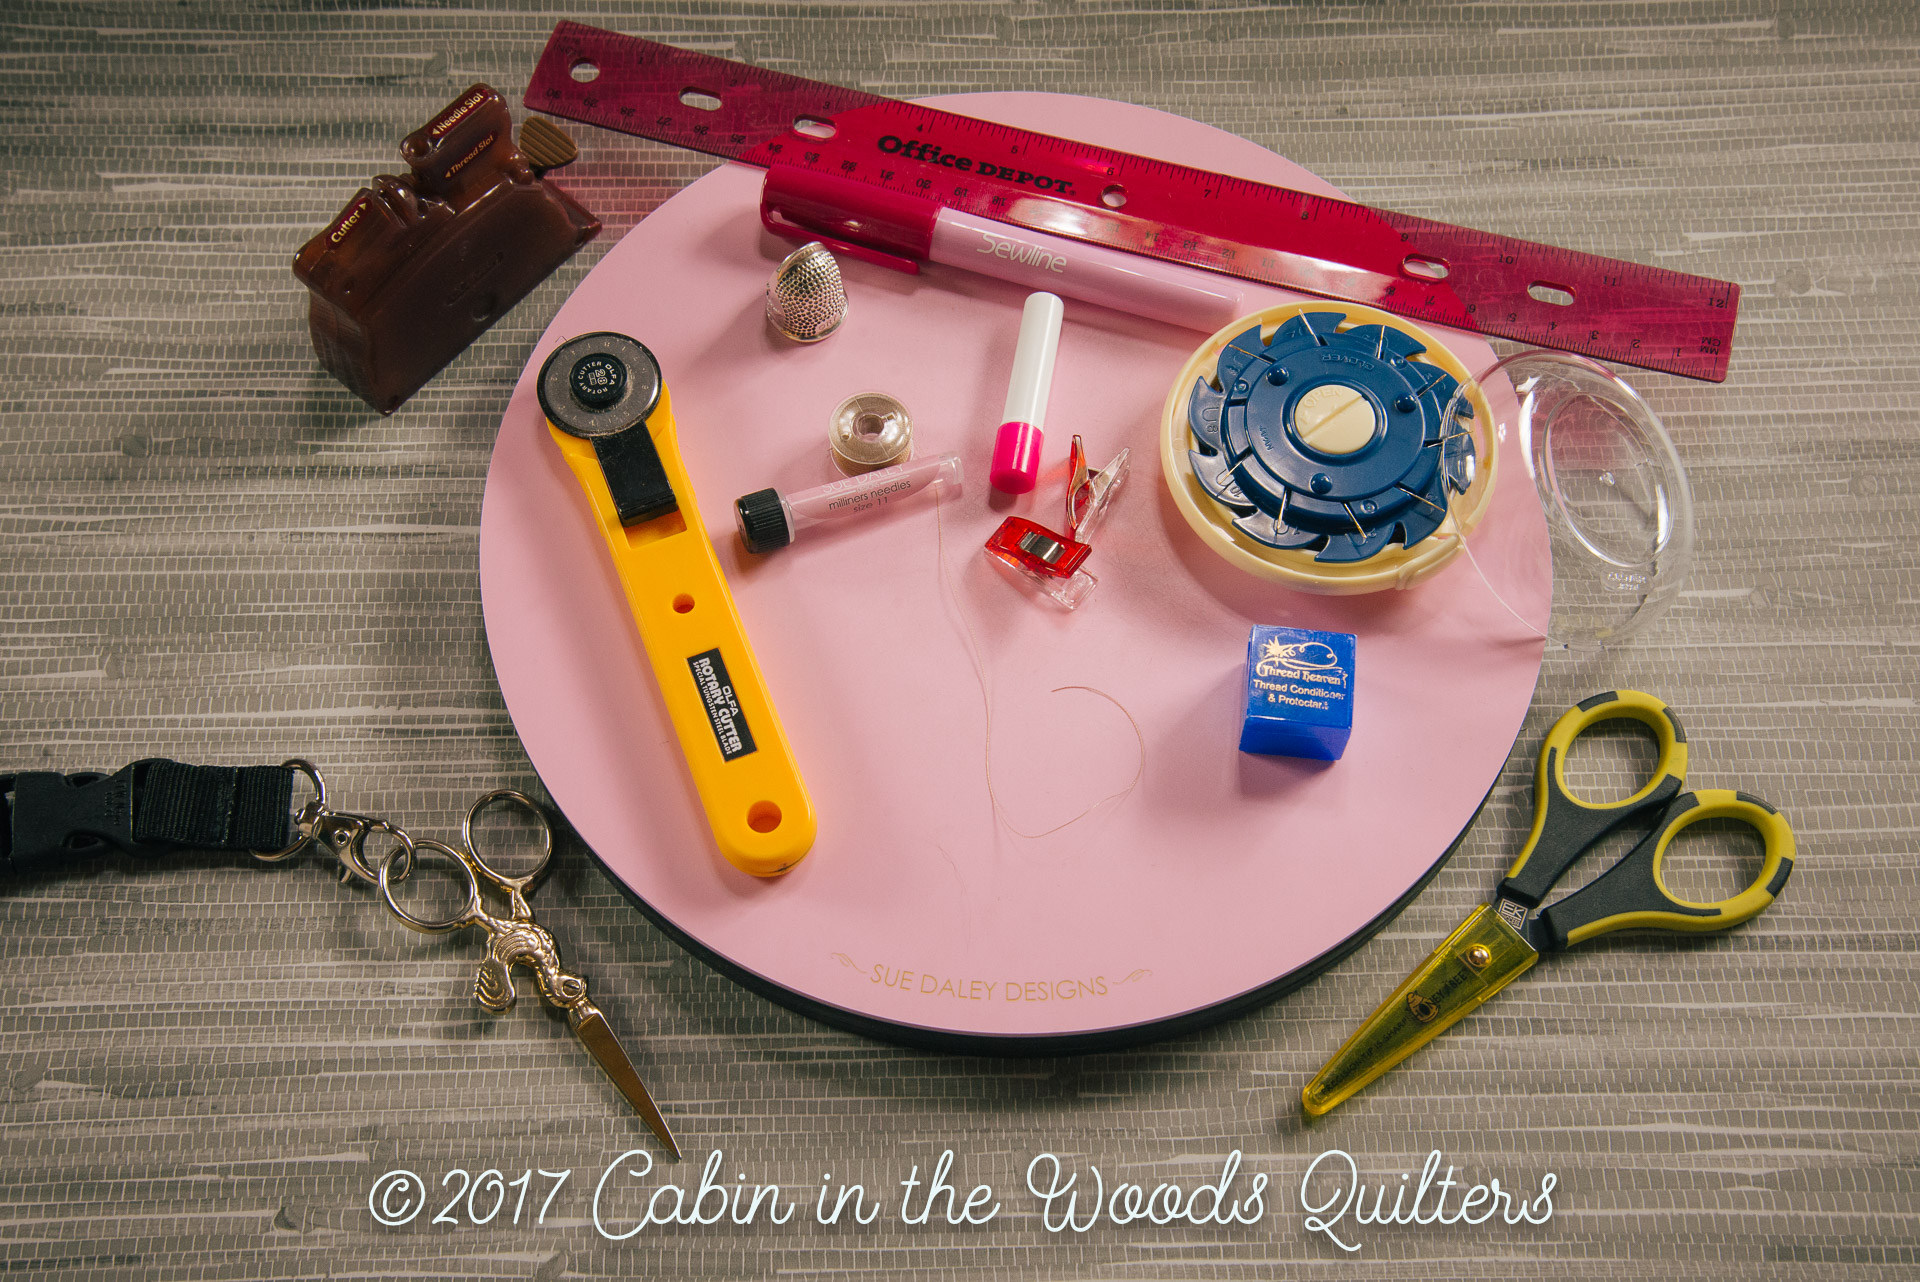
Here is a good picture of my favorite supplies with the exception of my templates and papers. Let’s break it down to the essentials. Everyone you ask will often have a different take on this question. Opinions do vary and there is no real right or wrong answer as to what you should keep in your arsenal. Here are some of my essentials explained.
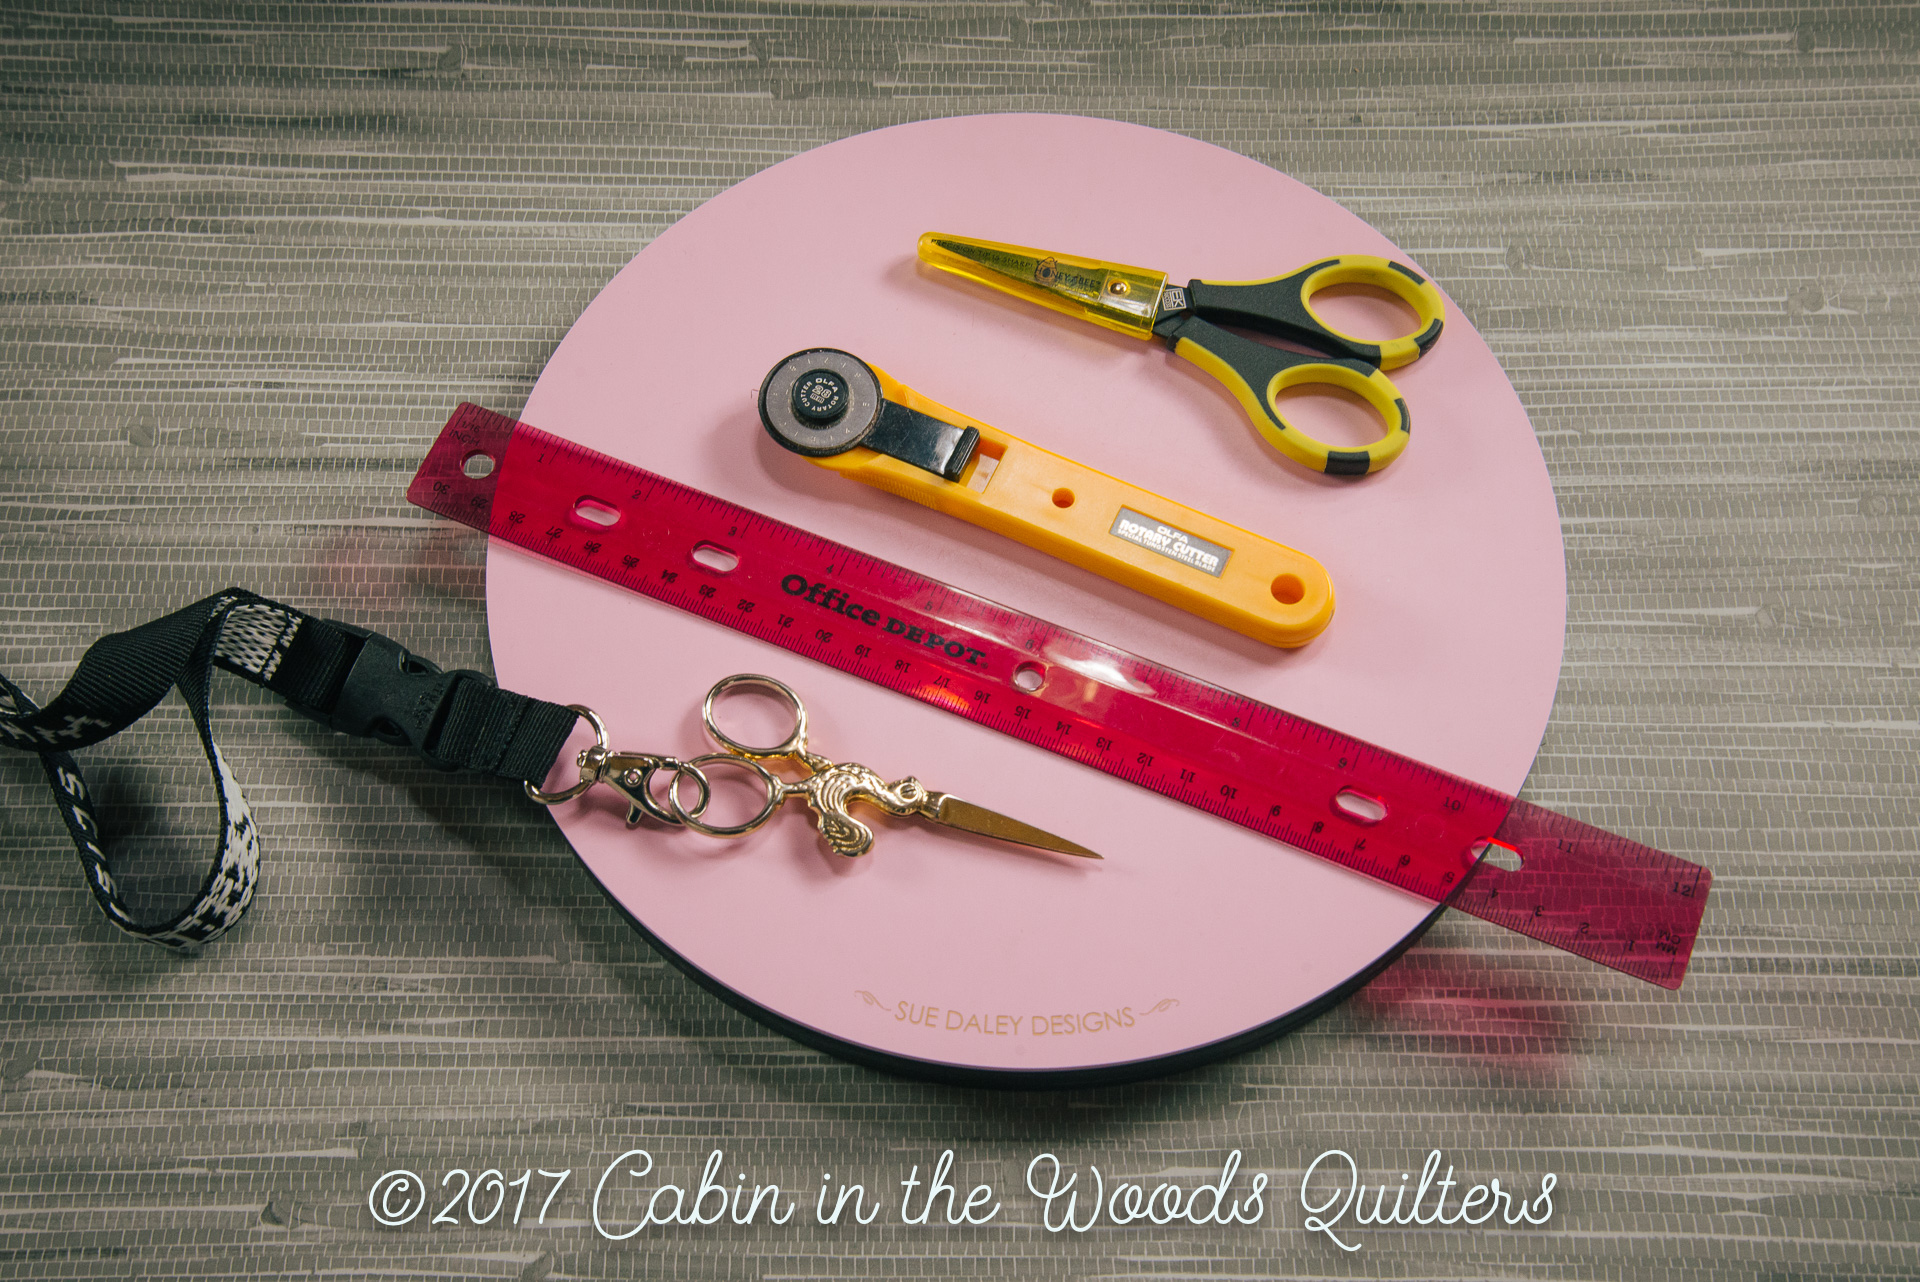
First topic is cutting tools. I prefer to keep a ruler around to measure the patterns in whatever book I am working with. I don’t like carrying my expensive quilting rulers everywhere I go and for the purpose of figuring out the length of a side to determine the template that I need. I prefer an inexpensive ruler from an office supply store. They double well as a bookmark too and if they get broken or lost there is no heartache.
I like working with a 28mm rotary cutter when working with templates. My templates are 1/4″ thick which makes it difficult to use an 18mm as the screw in the center of the blade may not be high enough but the 28mm is big enough to maneuver around the templates and small enough so that my hand and fingers do not get in the way of the blade. In addition, I work with two different pairs of scissors. The scissors in the bottom of the pic are embroidery scissors which hang around my neck on a strap and I use to clip my threads and fabric if need be. The scissors at the top of the pic are EK Success Precision Tip Honeybee Scissors which I use for cutting all my template papers. Having a precision tip is essential for getting those lines and cuts perfect. I definitely keep my paper scissors and fabric scissors separate so they stay nice and sharp. The EK Success scissors are for scrapbooking and will also stay nice and sharp.
Finally the rotary cutting mat. I have had several of these. Some were square and some were round. All do essentially the same thing. The one pictured above is the Sue Daley Designs version. This particular mat has no lines so there is nothing distracting about it. Also it sits on a raised base and spins on ball bearings like a lazy susan. I picked this up a couple of months ago and this little diddy is a dream. Its a little thick in the base though so maybe not a space saver for traveling.

Next up, tools for stitching. Next week I plan on talking a little about threads. I have a couple of examples to show of blocks I made with different threads and needles but for the purpose of this post I will talk about my favorites and recommendations.
I use a very thin thread (80 – 100 wt.). The thinner the better. Typically I will use polyester thread for this purpose. You might think not using a cotton thread would be a no no in quilting and I once had the same thought. Since I am a glue baster and use paper pieces in the back of my blocks I have chosen a polyester thread because it doesn’t have a tendency to fray when dragged across the paper. Many of the leading paper piecers also use polyester thread for this reason. I had settled on Superior’s Bottom Line thread. This thread was the finest I had found and was readily available. That is until last week. A friend of mine (Kelly Ann of Kelly Ann’s Quilting in Warrenton, VA) introduced me to Wonderfil Thread. The bobbin you see above is Wonderfil. This thread is very fine almost like a silk thread but a little sturdier.
The thinner the thread and needle the less your stitches will show. Needles should also be long and thin. I use #11 Milliners needles. You can also use #11 Straw needles. I have lots of different needles that I use for different purposes. Most recently I tried Sue Daley’s #11 milliners needles (pictured here) and I have come to like them at this time.
I use a thimble ALWAYS. Anytime I have a needle out I have a thimble. Which one you like will vary. I invested years ago in the Roxanne’s thimble in sterling silver and I have never looked back. Some prefer thimble dots or less expensive models. That is up to you. I have been gifted with tender feet and tender fingertips so I want to make sure that my fingers don’t look like pin cushions after hours of stitching.
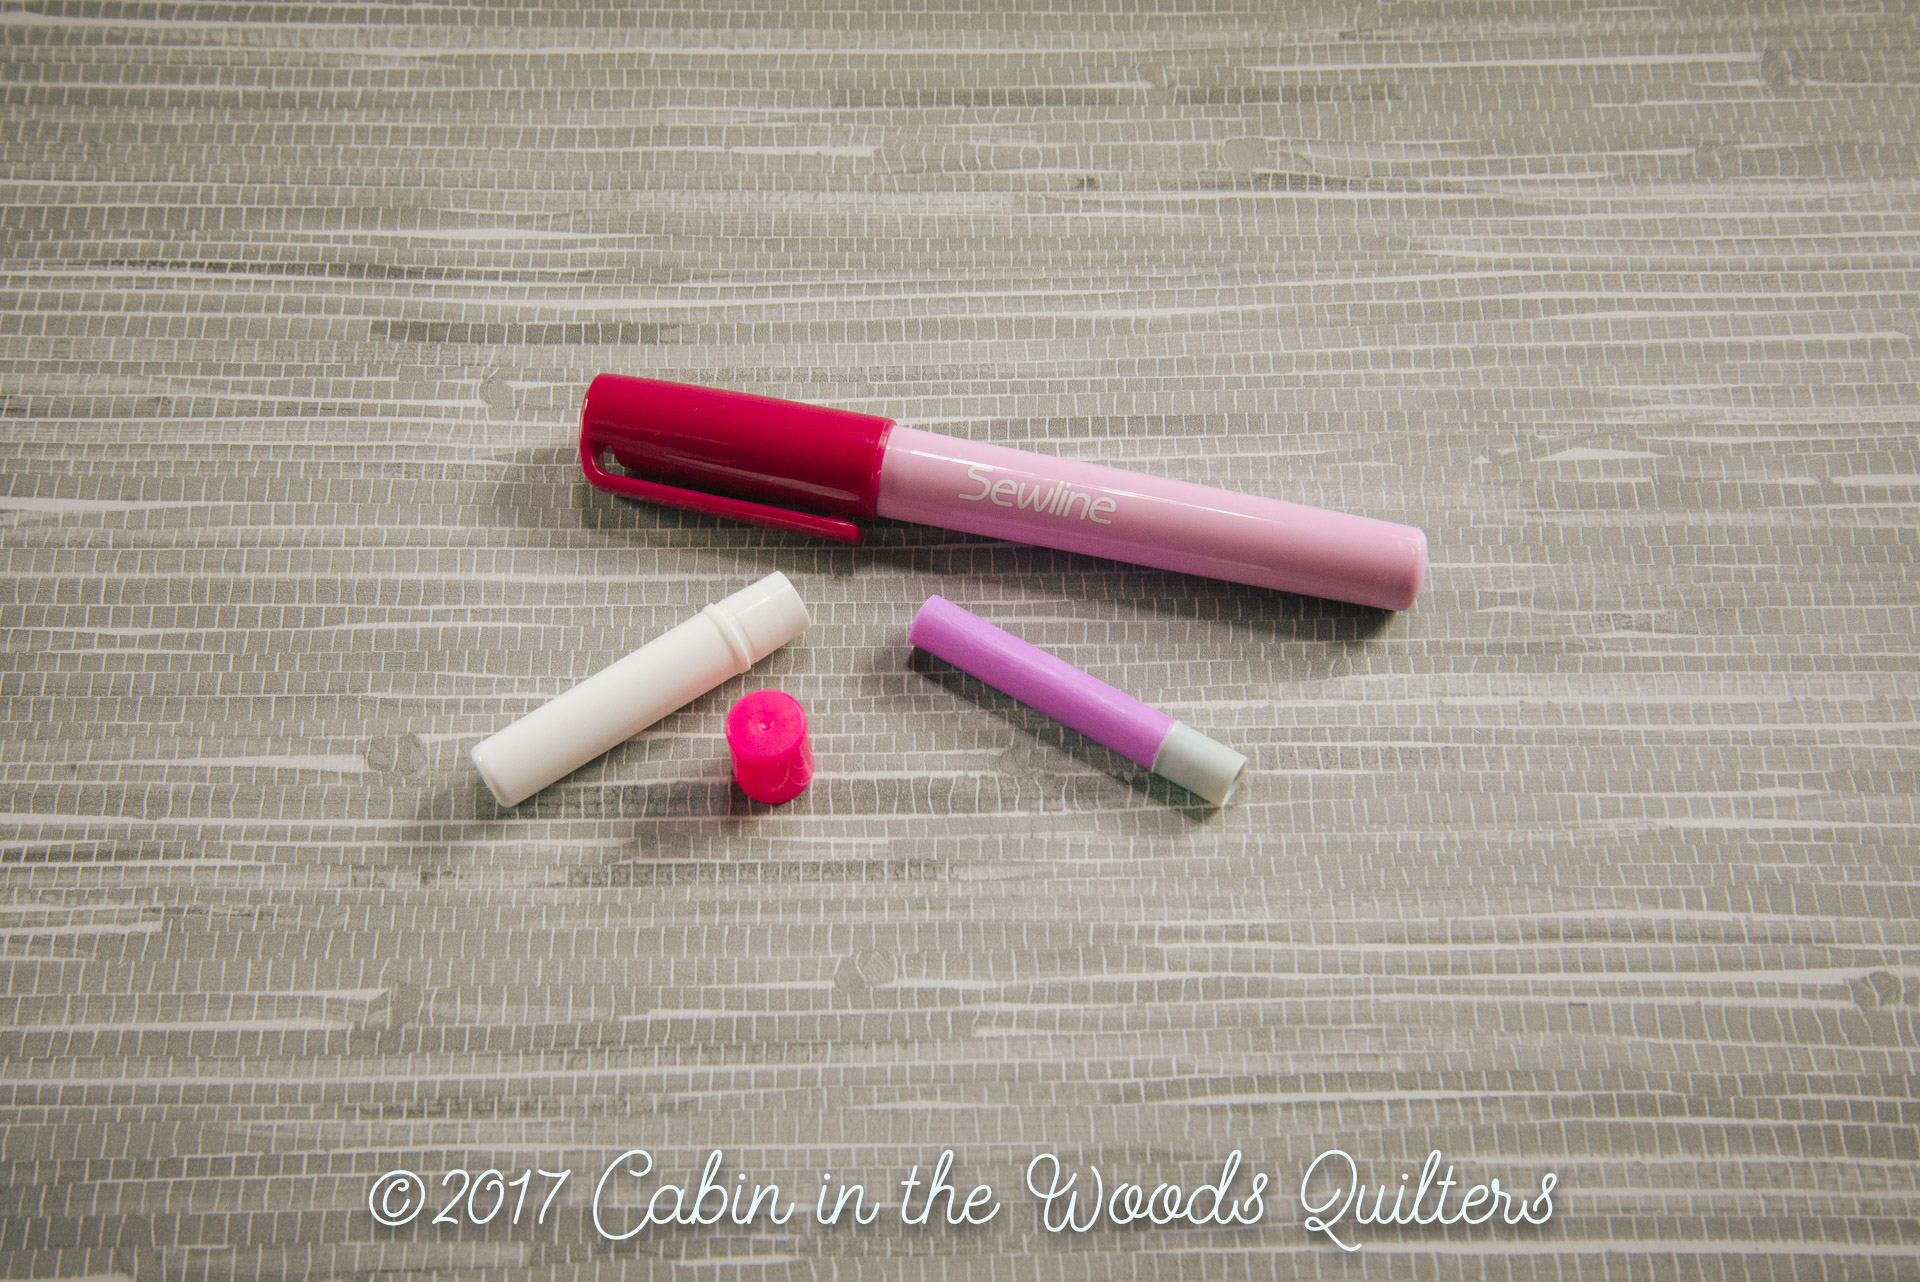
If you intend to glue baste, you will need a glue stick. I have tried several and they are all almost the same. You can use a water soluble glue stick from just about anywhere but if you are working with small pieces you will want a glue pen. Glue pens have smaller ends and are less messy when working with small pieces. Glue stick refills are essential as you will use more than you expect. The glue sticks are interchangeable. If you buy one brand of pen but can only find a different brand of glue… it doesn’t matter. I like the Sewline and Bohin brands the best for the glue. I tried the Quilters Essential brand and didn’t like the neon yellow glue for stick quality. You may feel differently. Don’t forget that the glue pens can be refilled. Don’t throw it away when it runs out.
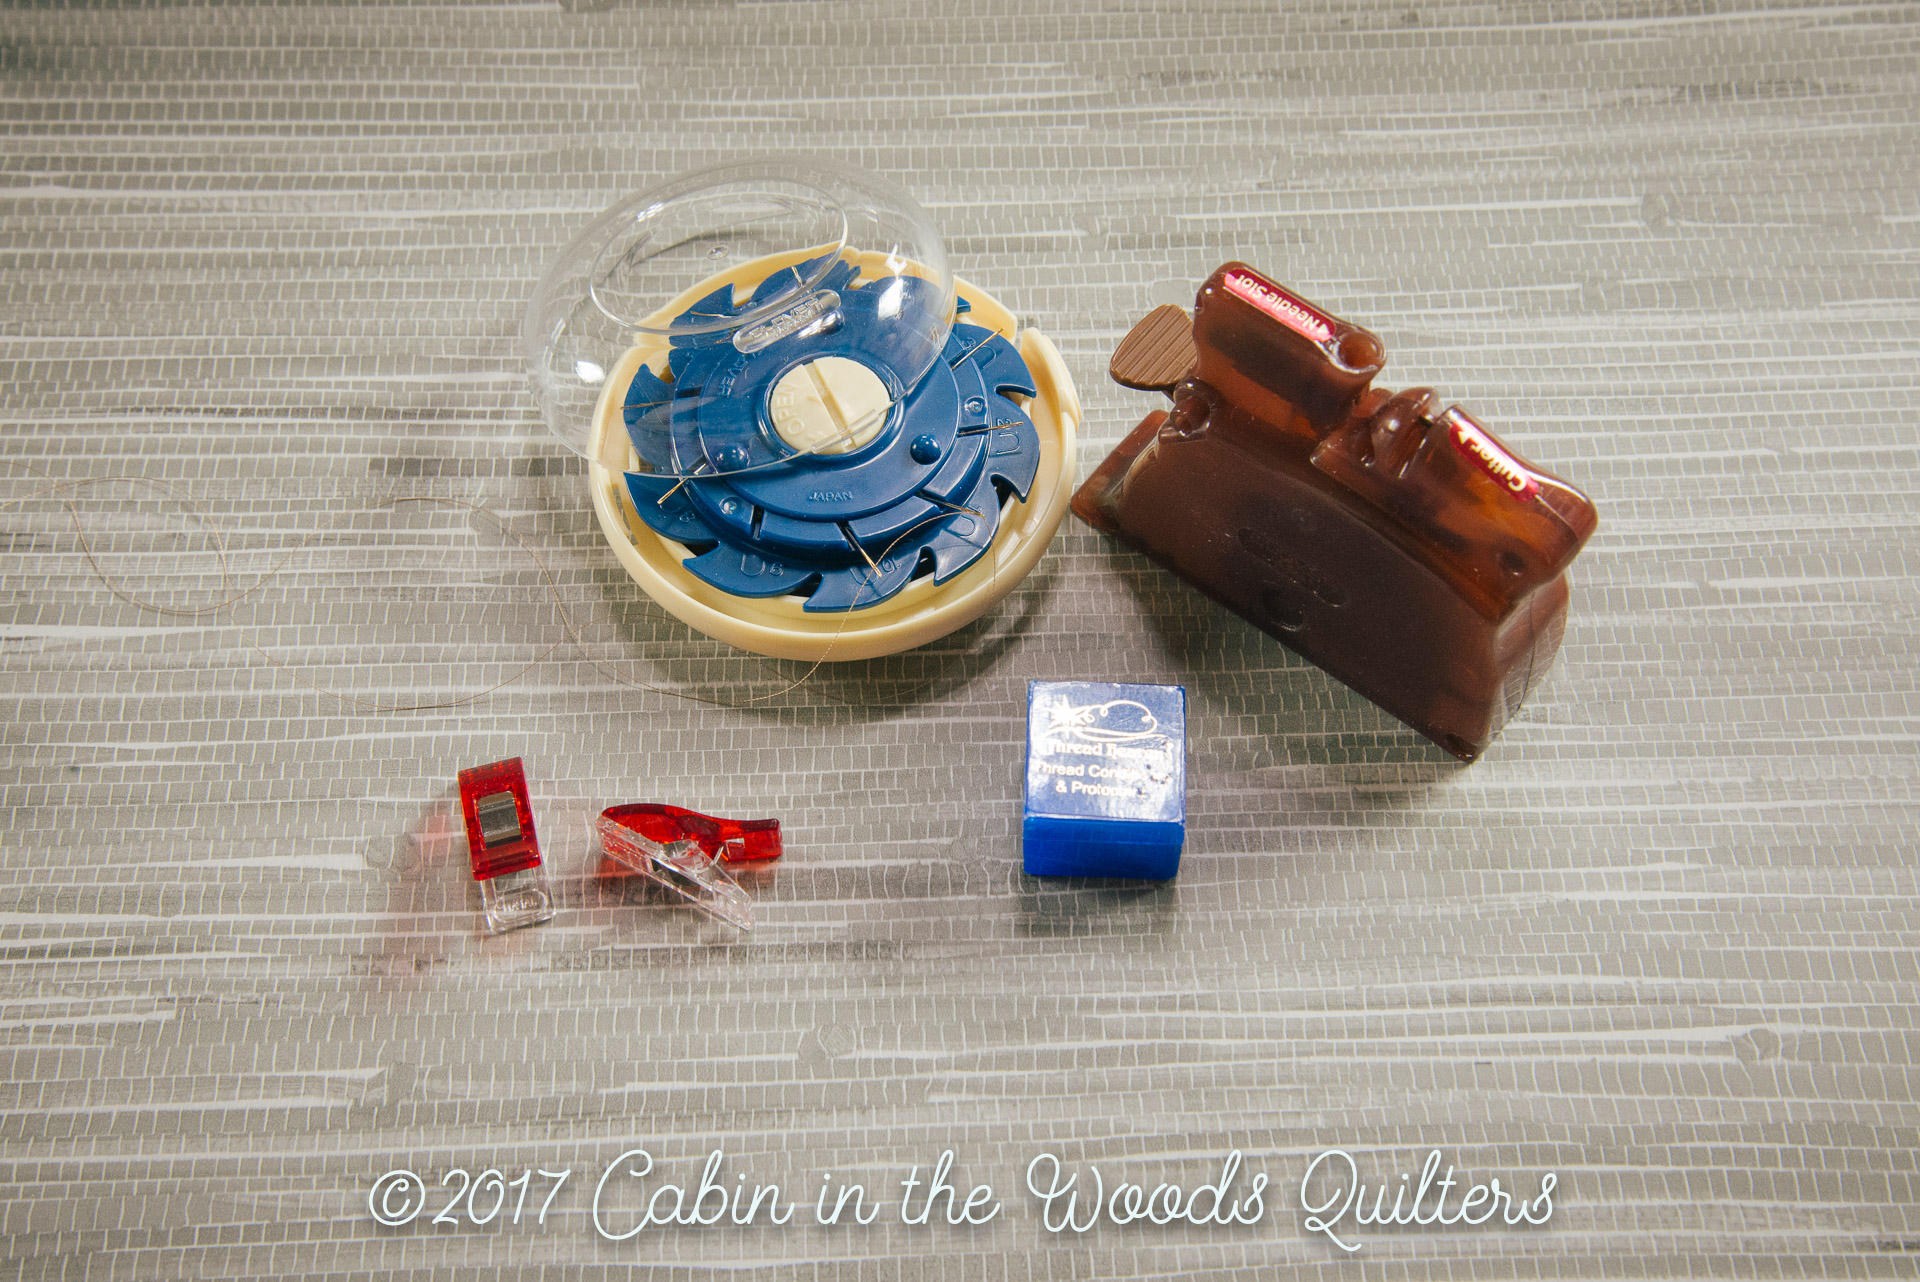
The above tools are not essential but you may find them useful when working with a needle and thread. Wonderclips can hold your pieces together and take stress off your hands. They can also be used to note which side you are supposed to be sewing together so you don’t make an accidental mistake.
The little blue box is thread conditioner. This helps the thread glide through the fabric smoothly and reduces the instance of tangles. Some thread has a tendency to tangle more than others. If you haven’t tried a thread conditioner you should. It can make a huge difference while you are sewing your bindings.
Needle threaders can be a must have for bad eyes. I prefer the clover and have used mine for years. I have to say that the new needles by Sue Daley have long thin eyes and for some reason this clover threader cannot thread them. I have tried many times. All the other needles thread so I don’t think it’s worn out… so just keep it in mind and try them out.
The last item pictured is a strange little gadget that I received as a gift years ago. There are 10 spaces around the circle for placing your needles with thread attached. The whole thing winds up like a fishing reel and holds 10 threaded needles ready to go. I have to admit… this item has been in a drawer for close to 10 years. I didn’t think I would ever need it. But I took it out of the package to try it about two weeks ago and love it. I sit and thread 10 needles in advance and then sit and stitch. Now I don’t lose my thread spool in the couch cushions. When the thread runs out I put the needle back in and take the next one out. This is definitely not a necessity but if you get your hands on one you should try it.
The final item that I use is a project box. It doesn’t matter what kind you use. When I am taking multiple projects with me I tend to carry a large quilting project box by ARTBIN but more recently I have found that if you are working on a small project or taking a couple of blocks with you somewhere you really only need a place to keep the pieces, thread and needle so that you don’t stab yourself. I use an A4 document carrier for papers. Its just enough space to hold your block, supplies, pattern and book. Here is an example of one that I found on Amazon.
So that is the basic supply list that I use to work with English Paper Piecing. These tools on the hole are not expensive and are quite portable. Once the project parts are together, carrying the actual project around is quite simple. The draw of English Paper piecing is no sewing machine is required and you can sew anywhere. But enough about that… let’s get to the blocks.
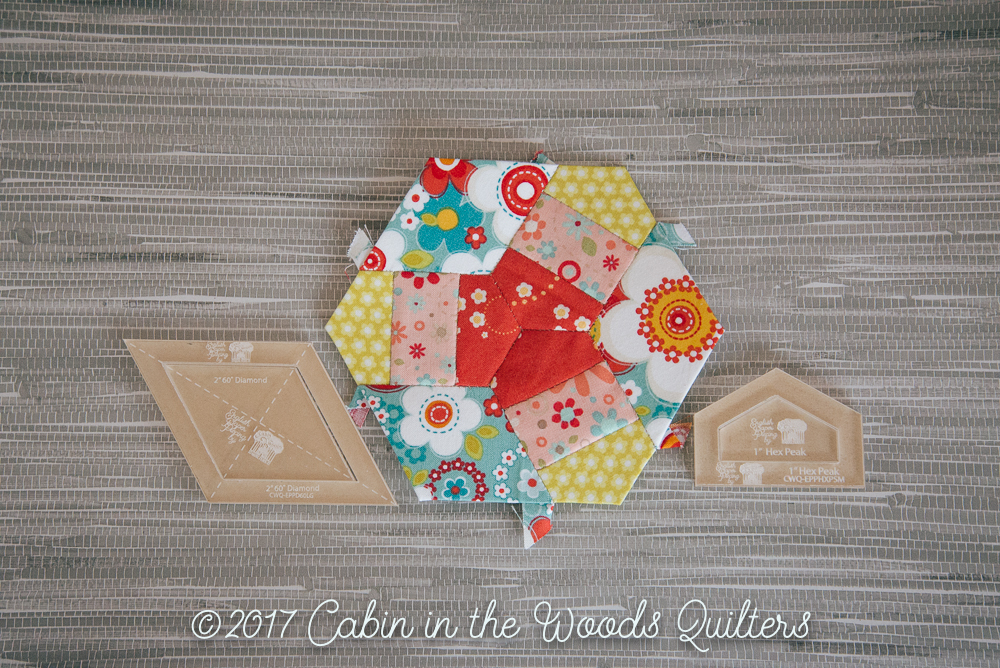
Block 21: Elaine…
was created using the 1″ Hex Peak from the Small Set and the 2″ 6 Pointed Star from the Large Set. Also needed for this block is a 1″ x 1 3/4 rectangle. We do not have rectangles sets in our line yet. Rectangles tend to be varying sizes and a little easier for you to make on your own with a ruler. But just in case we have included a CWQ Printable for this block that you can print directly onto your own card stock to make this block super simple. DOWNLOAD FILE HERE.
Block 22: Nancy…
was created using a 7/8″ Kite template. We don’t make a 7/8″ template as this is an odd size. Since the author needed this block to fit perfectly with all the others she needed to reduce the size by 1/8″. But no to worry… because we have created a CWQ Printable to make your life easy. You can use the Outer Halo from the 3/4″ set or the 1″set to cut the fabric with seam allowance for these papers. Just print out the document to your home printer onto 65lb card stock from the office supply store and make your own papers. DOWNLOAD FILE HERE.
Block 23: Dawn…
was created using the 1 1/2″ Hexagon and Half Hexagon templates in the small sets.

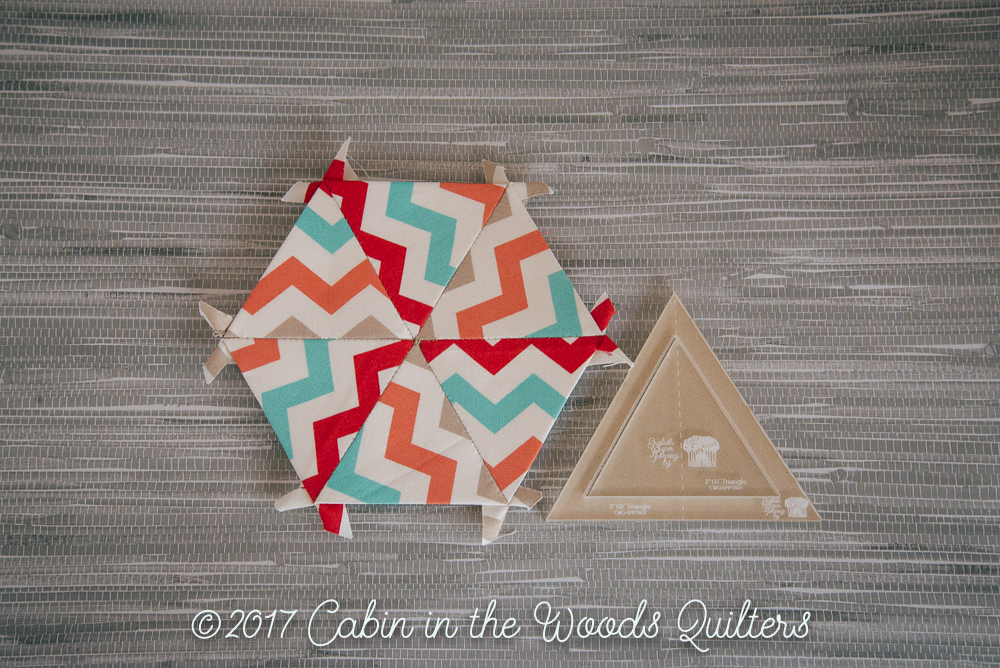
Block 24: Evelyn…
…has some choices for you. I created my Evelyn Block by stitching 3 – 1 1/2″ strips of fabric together, pressing and using my 3″ 60˚ Triangle template to cut out my triangle pieces. I flipped my template back and forth to get the most out of my strips. This works well but changes the block just a bit. Instead of getting a consistent fabric on the bottom strip created the whirligig design, I have an alternating fabric. You can avoid that by not flipping your template but you will use more fabric. But…
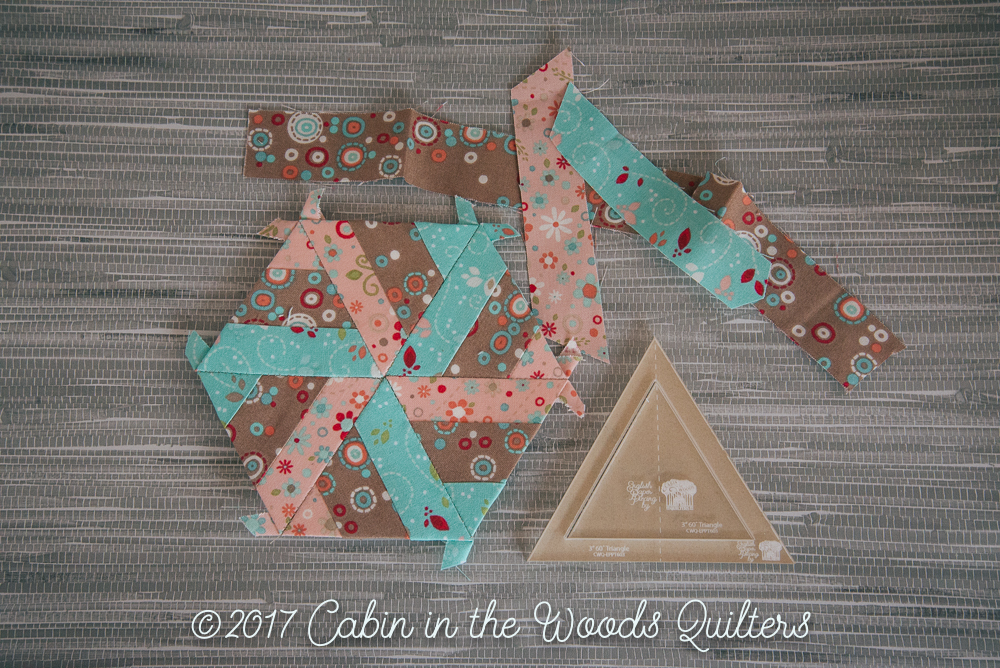
… you could avoid this altogether by using a directional fabric that gives the impression of the whirligig design without piecing at all. You may feel that this is tantamount to cheating. If so, you can use the fussy cut method and create the block as it was exactly intended. Use the 1″ 60˚ Triangle template from the small set and the CWQ Printable we have created for the other odd shapes. DOWNLOAD FILE HERE.
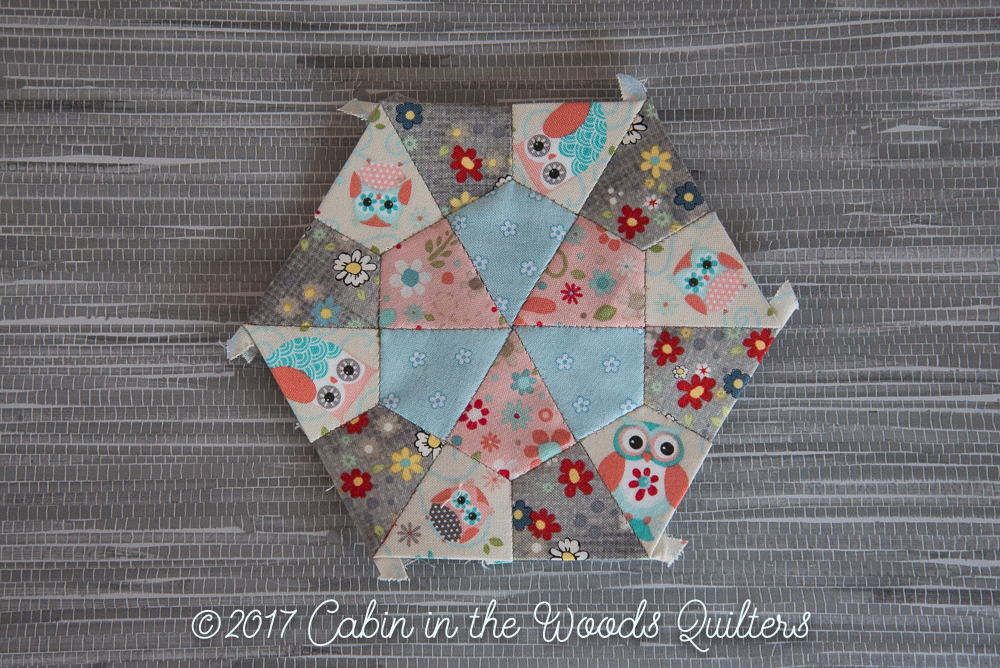
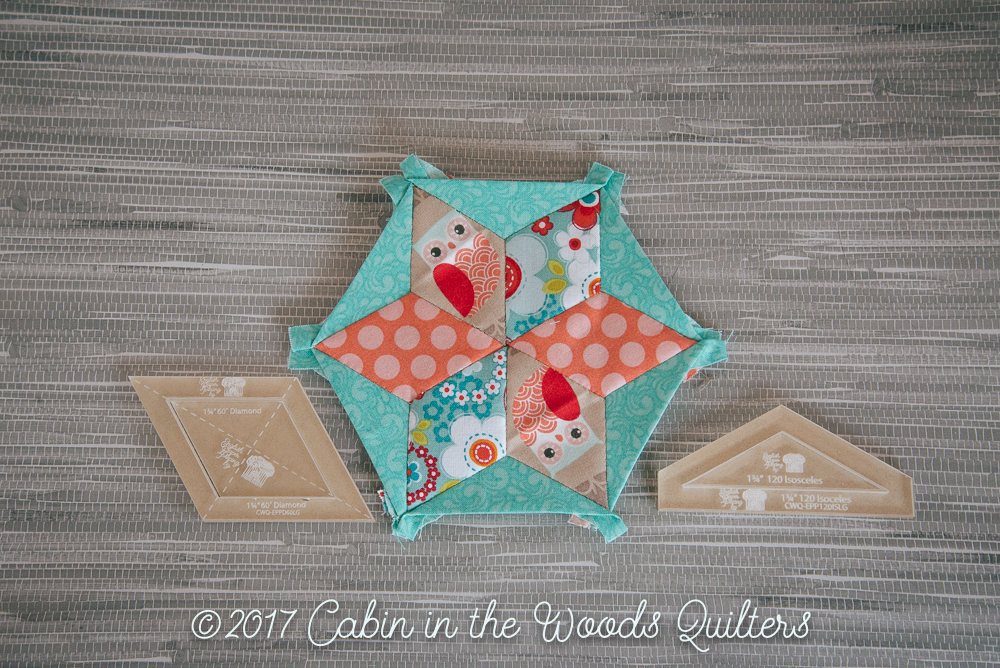
Block 25: Marjorie…
was created using the 1 3/4″ 6 pointed star and 120˚ isosceles triangle template from the large sets. Peek-a-boo owl fussy cutting on this block.
So far in this Quilt Along we have used templates from the following CWQ sets:
Hexagon Small Set 6 Pointed Star Small Set 6 Pointed Star Large Set
60˚ Triangle Small Set 60˚ Triangle Large Set Jewel Small Set
Half Hexagon Small Set Kite Small Set 120˚Isosceles Triangle Large Set
We list them here so you can find them easily on our online store. Remember that several sets are used multiple times throughout the book/calendar and you will use multiple sizes from each set throughout the book/calendar as well. Of course you will use them again and again throughout your EPP lifespan as the same shapes appear in many designs. All of the shapes in the New Hexagon will have some relationship to 60˚ because they are hexagon based.
If you missed the other blocks in the Quilt Along you can find them all on our blog page or by clicking here.
Make sure to enter the Template Giveaway below.
~Happy Stitching
a Rafflecopter giveaway