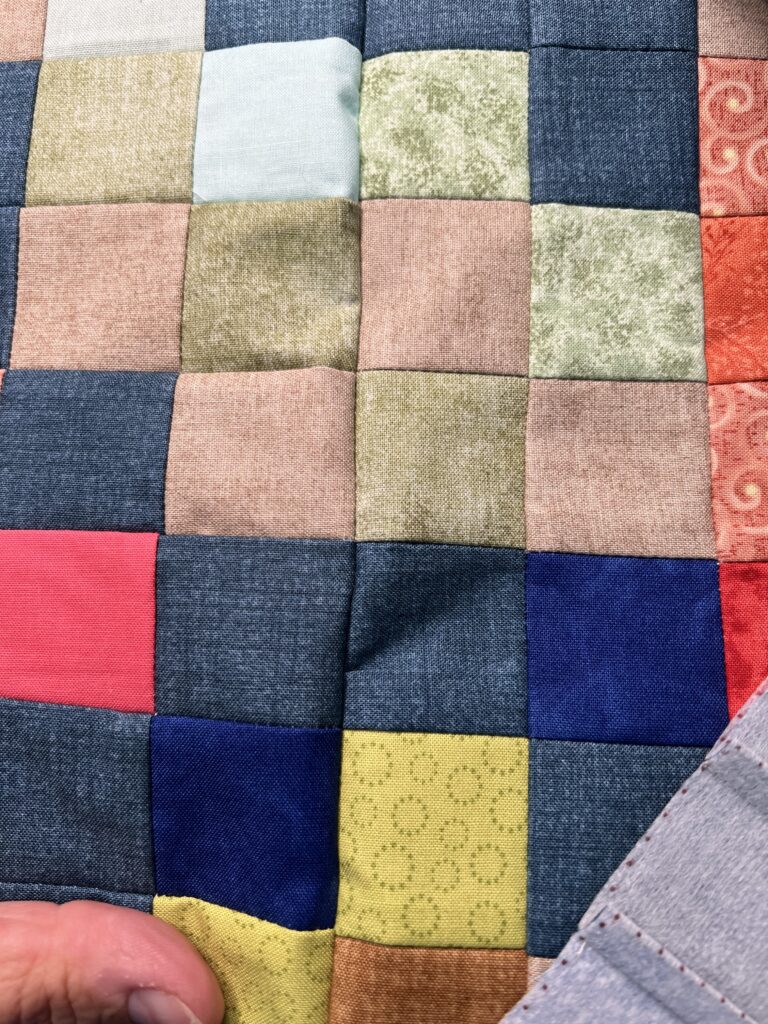
One of the best techniques I can share is how to get all your block seams to line up. This technique can be used for adding borders, or assembling your blocks for your top, or even lining up individual units in blocks as shown below.
Are you working on a project that requires lots of seams to match? This can be a big struggle, especially for new quilters. Often new quilters (just for lack of practice) have issues with blocks lining up due to improper cutting (ruler slip or misreading the ruler), improper pressing techniques (leaving fold-overs in the seams when pressing or using too much steam), or simply by not using an accurate 1/4″ seam allowance. All of these issues can plague new quilters and experienced quilters alike and prevent them from tackling more ambitious projects.
But even the most experienced quilters can have a little “seam slip” every now and then which means that our blocks may not line up in a perfectly straight line. If you have a block that requires lots of seams to meet, learning to alternate your pressing to help lock seams can make all the difference. It means you have to think a little bit when you are pressing your next row to alternate the side the seam is pressed on. Also, try using this pinning technique on your next project.
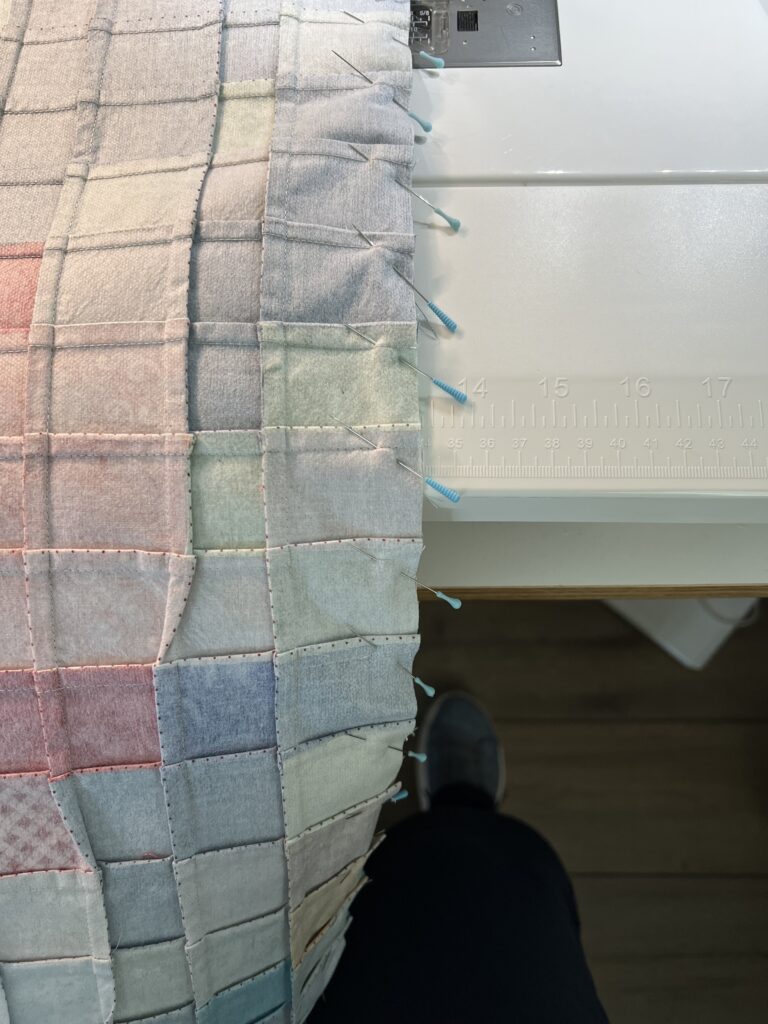
Instead of pinning your seams straight across at the actual seam, try pinning at an angle with the head of the pin towards your hand. Pins should enter into the piece at approximately 1/4″ past the seam but the pin should enter into the seam off to the left, far past a 1/4″. You want the pin to be AWAY from the needle but also inserted into the seam to hold the seam together. Put your needle in the Needle Down stopping position if you have one or gently turn your fly wheel on your machine to place the needle of the machine into the seam (WITHOUT RUNNING OVER THE PIN… WHICH YOU SHOULD NEVER DO!).
Notice that I have pinned at every seam. Now I don’t always pin at every seam on every piece. But this example is a series of 2″ squares, which leave lots of opportunity to shift and look awful.

You can see in the above photo, my needle is stopped in the seam, but is not hitting the pin or anywhere near the pin. The needle is now in the seam preventing the seam from shifting. You can now reach up with your right hand and pull the pin out by the head and continue sewing to the next seam. By taking the time to pin each seam and stop at each seam while sewing, you can really make a difference in your finished project. If you want your rows to be perfect, try taking your time and pinning where it counts.
You will be really happy with the final results and perhaps will try a sewing project that you may not have otherwise tried.
For the whole lesson is action, head over to YouTube and see our example video used to assemble our 2024 Cottage Temperature Quilt. Follow the link below.
Happy Quilting,
Penni