
Hello Gang and welcome to another episode of Penni’s Pointers. Despite the mixed messages from Mother Nature, it is springtime and time for a little Spring Cleaning in the studio. I thought I would start with my iron. I have used a few more fusibles than I would like in my studio in recent weeks and had another one of those unhappy accidents where I placed my iron a little too close to the edge and caught a little fusible sticking out from under my applique pressing sheet. Sometimes the buildup on our ironing surfaces is less the result of an unhappy accident and more the result of months of starch buildup or in the case my studio, a little overspray from my Terial Magic.
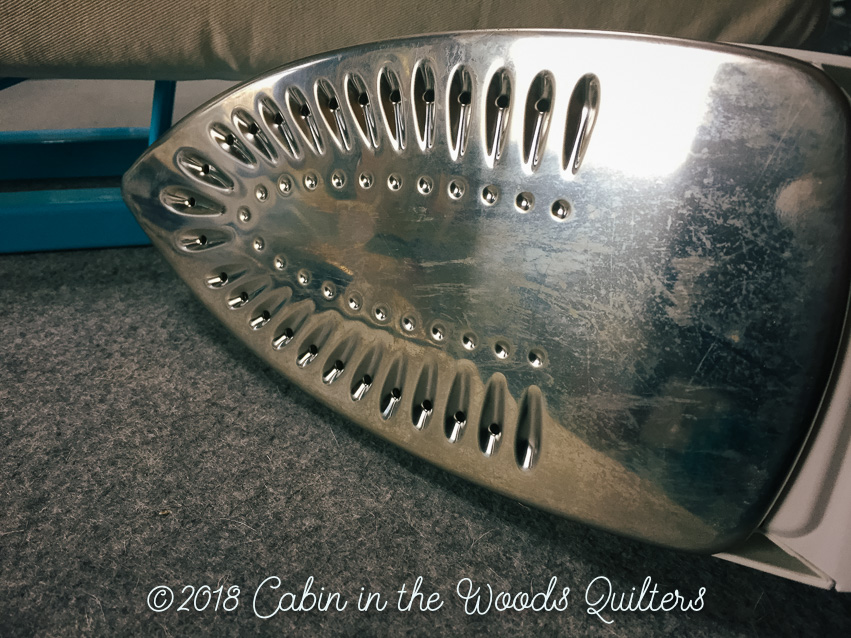
So… it’s time to clean the surface of my iron.
Student tips for cleaning your iron in a pinch
I learn so many interesting tips from the students in my classes. Some work for me and change my life. One of my latest students made a slip up with her iron in class and pulled a dryer sheet out of her QUILTER’S TOOLBOX and used that dryer sheet to clean off the surface of her iron before finishing with her project. I was blown away. I didn’t know you could use a dryer sheet for that.
She put her iron on medium heat, laid the dryer sheet on the ironing board and began to iron it. She scrubbed back and forth and eventually the buildup came right off. This particular student had a non-stick coated iron and the dryer sheet worked like a charm. According to several of my students that little tip works grand and it doesn’t matter whether the dryer sheet is new or used. So now you know what to try with all those little dryer sheets that you find in the leg of your pants when you are walking in to work (or is that just me?).
To take the tip to the testing mat I set up this scenario in my own studio. My iron is a stainless surface and the next time I got a little something on my iron I tried that out. I have to say I was a little disappointed in the result. My iron did get a little cleaner and it certainly smelled nice but I didn’t find it cleaned as well as my little solution. But, I think you should have a go at it and see if it works for you. Lots of quilters swear by this tip.
My tip actually uses a product that is specifically designed for this purpose and I have a little video that shows you how it works.
Iron-Off Iron Cleaner
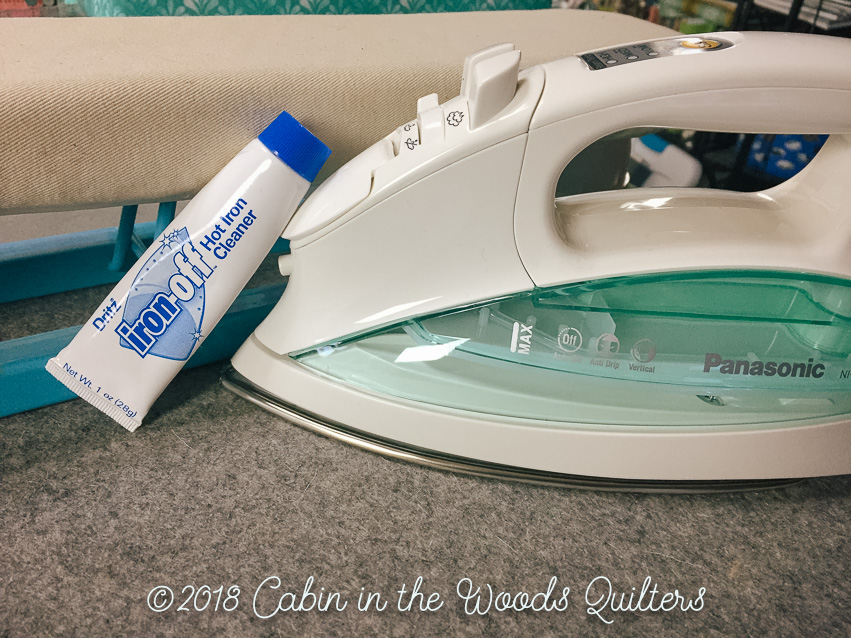
Years ago I had an incident with my iron that I would soon rather forget and called the emergency hotline for sewing information (aka, Mom) and begged her to save my iron. She turned me on to a little-known product that shops sell called Iron-Off. This handy little friend has gotten me out of a lot of scraps and near misses with my favorite iron and I keep it in my QUILTER’S TOOLBOX as well as my teaching kit for students just in case.
Wanna see how it works? Well, just check out my little video here and watch me clean my iron. (No… really. It’s riveting)
Don’t forget to subscribe to my YouTube Channel.
So glad you stopped by
Well, gang… thanks for joining me for another blog installment. Tune in next week where I show you a handy little stitching lesson, for both English Paper Piecing and beyond, that you can keep in your QUILTER’S TOOLBOX. You don’t want to miss it. Make sure you subscribe to the blog or you can check out the weekly post on Facebook and Twitter. Don’t want to commit? Well… check back each week and see what’s new.